The Task Manager is a tool for the artist. They can see what tasks are assigned to them and launch the tasks through this tool.

General UI Breakdown
As is most of the tools that come with this pipeline, the user interface follows the same layout explained in the Standard Interface section of the manual; Menu Bar, Header, Main Section, Status Bar.
In the Main Section of the Task Manager, there are four parts;
- Filters
- Job Selection
- Tabs Bar
- Task List
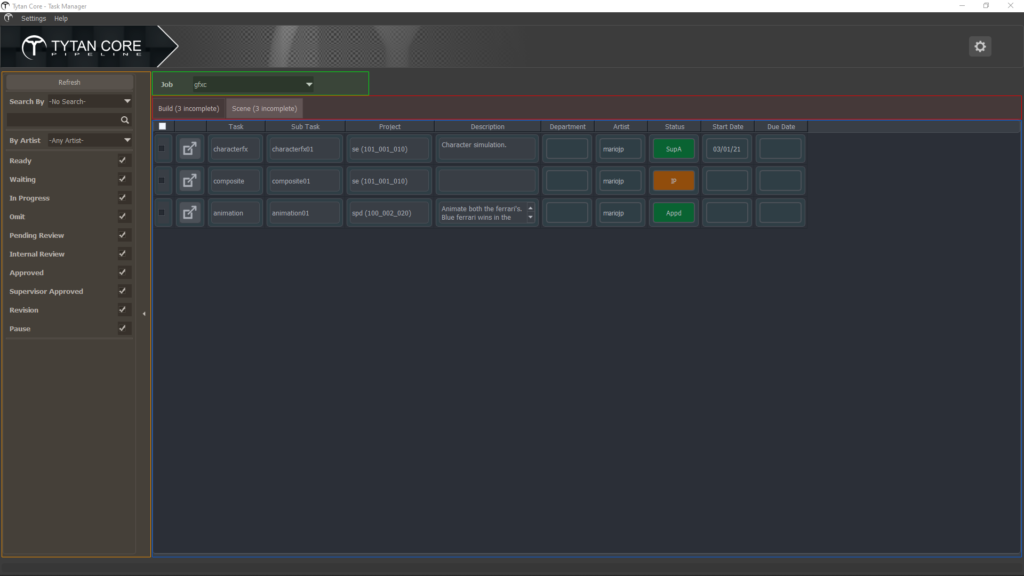
Filters *
There is a hidden filters section that you can reveal by clicking on the little arrow symbol.

Filter Options
Refresh – Refreshes the list of tasks shown.
Search By – Is a dropdown list of available filters for the Search Bar just below it.
Search Bar – Type what your looking for from the list of tasks and all other tasks that don’t match will be filtered out.
Include Inactive Artist – Check this if you want to include tasks that are assigned to inactive users.
By Artist – Filter out all tasks except the ones that are assigned to this selected artist.
Active Tasks Only – This will filter out all inactive tasks.
Status check box filters:
| Ready Waiting In Progress Omit Pending Review | Internal Review Approved Supervisor Approved Revision Pause |
Keep Select After Change – Having this option enabled will just keep your selections selected after changes are made.
Job Selection *
Select the job you want to see the tasks for.
Tabs Bar *
There are 2 tabs to separate the Build tasks and the Scene tasks.
        Build Tasks are tasks for assets and elements.
        Scene Tasks are tasks for project levels.
Task List *
This section of the UI displays all the tasks assigned to you. The data is laid out in a table format, listed top to bottom. The only column that can be modified is the "Status".Double click the status item to change the value.
To open a file version of your task or start with an initial file version, click on the launch button next to the task.
Launch Task UI
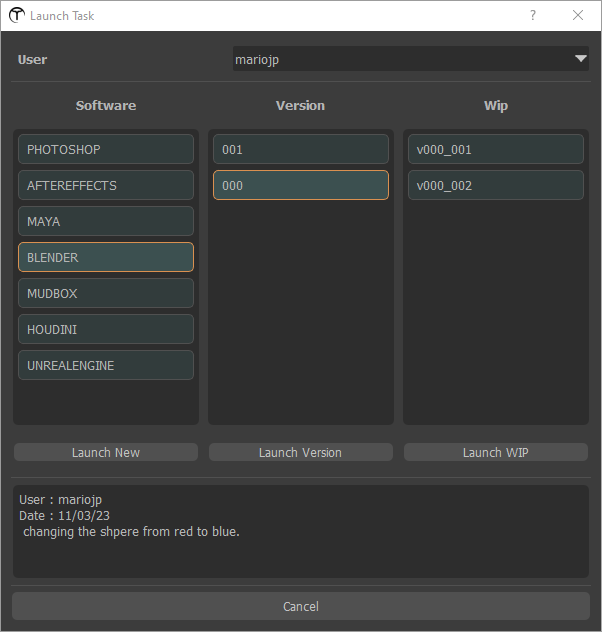
Launching tasks are easy using this UI.
Let’s break it down:
- User – Select the user to get access to there file versions.
- Software – A list of the applications available for the job you have selected.
- Launch New – This button, that sits just below the Software list, will open an initial scene file for the software you have selected.
- Version – This is a list of the available versions for the user.
- Launch Version – Is the button to press to open the selected version in the software you have selected.
- Wip– This is a list of the wips (work in-progress) available for the user.
- Launch WIP – This will open the selected wip file in the software you have selected.
There is a small section below the lists that provide the notes and metadata for the selected version or wip.
And there is a cancel button at the bottom.