- 6 level system for maximum flexibility
- 3 type functionality [Standard, Sets, Crowd]
- Some Third-party integration
- Save works in progress (wip) and publish your scenes
- Cache exporting. (Supports FBX, Alembic, OBJ, UNCPACK and a few others)
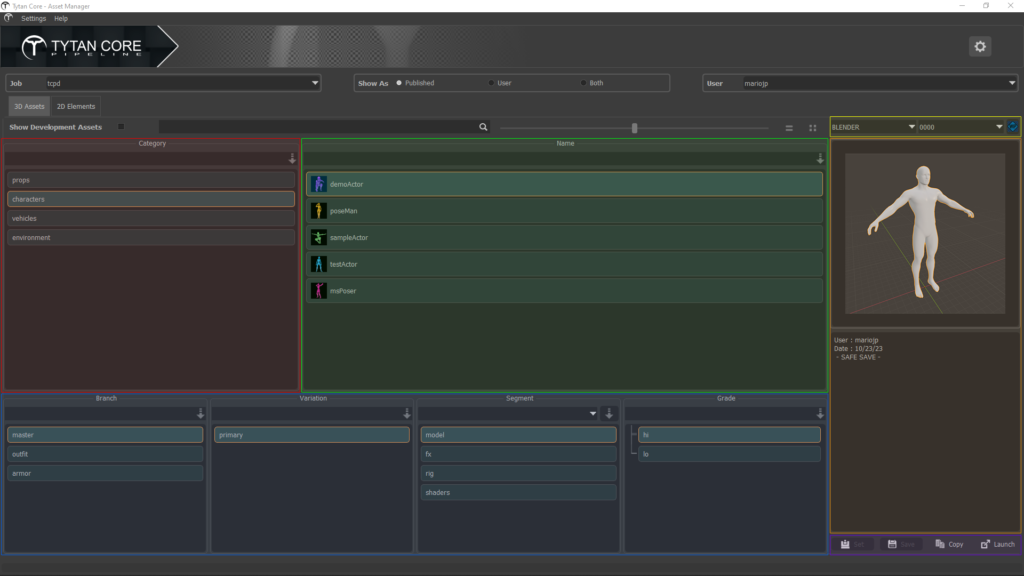
Asset Category *
Assets are organized under categories. Make your category selection in this section.
Add a new category by putting a name in the field above the selection list and clicking the button beside it.
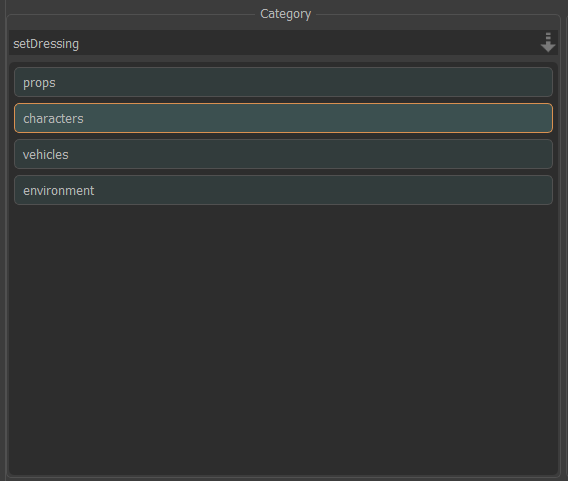
You can remove the entire category. Right click on the item in the selection to get the option to delete.*Note that if you remove an item, it will remove it's hierarchy (nested items)
Asset *
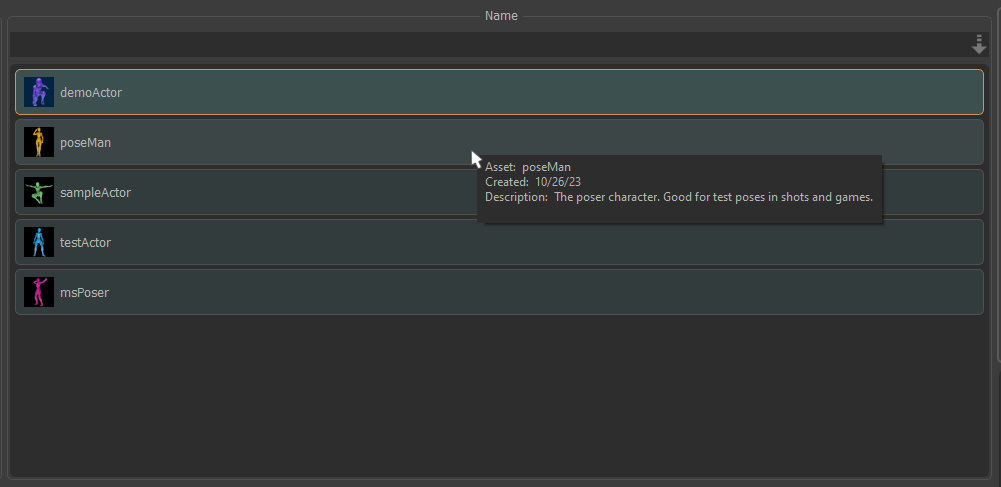
In the section labeled “Name” you will find a list of your created assets.
Add a new asset by putting a name in the field above the selection list and clicking the button beside it.
Note : only admin users and users with a level 4 permission can create assets.
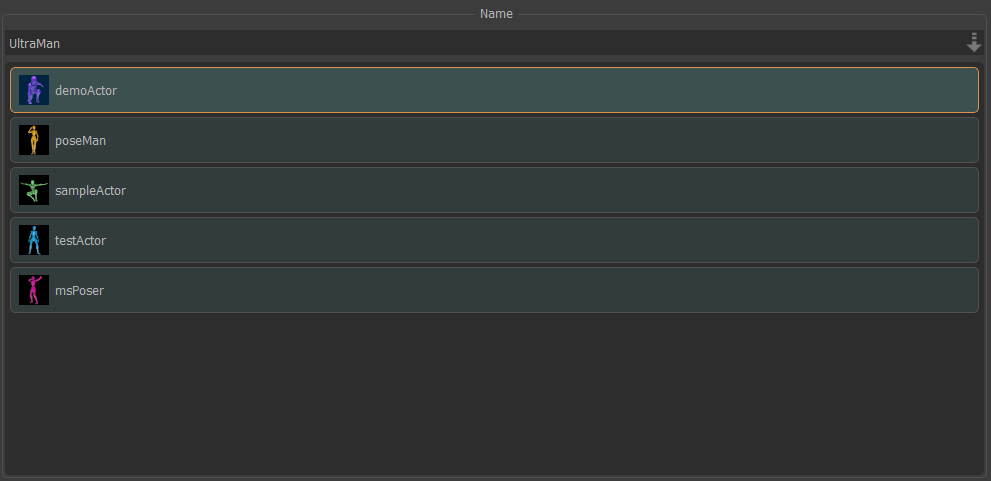
After adding an asset to the list, you can then right click the asset item to get an “Edit” option. And in there you can modify it’s description and add a profile image.
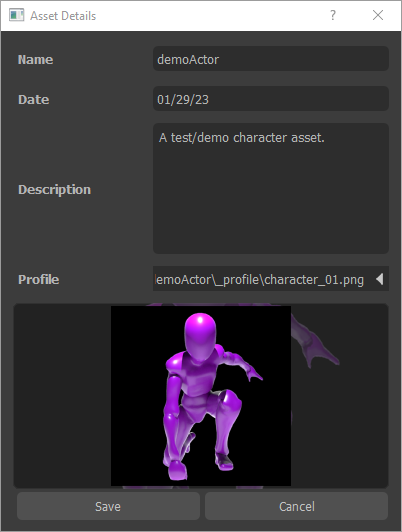
Hover over an asset to see its description.
To remove an asset, right click on the item in the selection to get the option to delete.
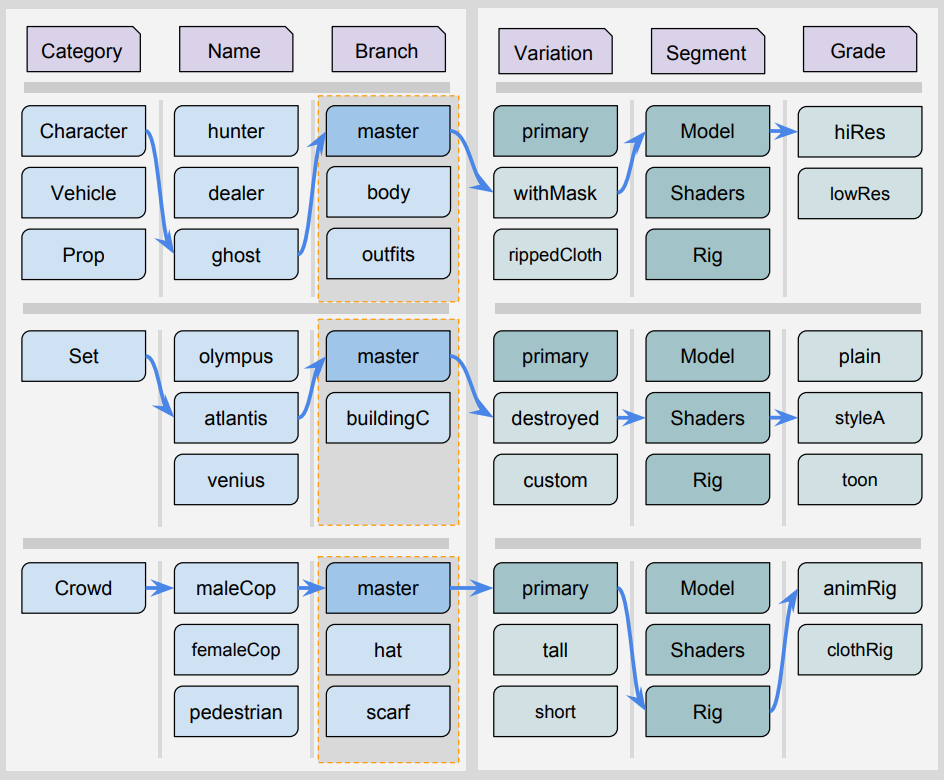
Asset Sub Structure *
A good asset can make or break the quality of the story your trying to tell. To help reduce any limitations and increase functionality, an asset can be broken down into multiple parts with multiple variations. This provides convenience when interchanging objects in an asset or producing variations of that asset.
There are four structure levels in this six level system:
- Branch
- Variation
- Segment
- Grade
Branch
Works like an assembly, it flows bottom to topConsider the Master item the main part of the asset and everything or some of the below items are ingested in with the main part to make a complete asset.
Variation
Now with a level for variations, you can interchange the different branches to produce a variant that is different from the original.You can also create specific parts within the variant to add additional unique characteristics.
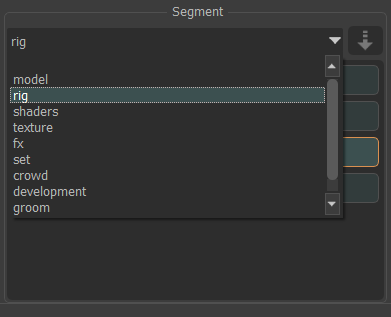
Segment
A segment is basically the task or functions of each variant. For example,
        model - the geometry and hierarchy of the asset or asset part variant.
        rig - the control driven aspect of the asset to offer a range of movement.
        shader - the material objects used to define the way color and light effects all or parts of the asset.
Grade
This is simply the level of quality.For example, a previz rig (proxyRig) is a lower budget, minimal functioning rig that is good for quick blocking and animatics, where as a fully functioning animation rig (animRig) is made to provide the animator with the maximum amount of freedom and control to achieve higher quality animations.
Scene/File Versions *
This highlighted section gives the user the options to pick the software and version of the scene files for an asset.
- Select the software that is associated with the scene file

- Select the version of the scene file

Open the scene file by clicking on the Launch button at the bottom right ![]()
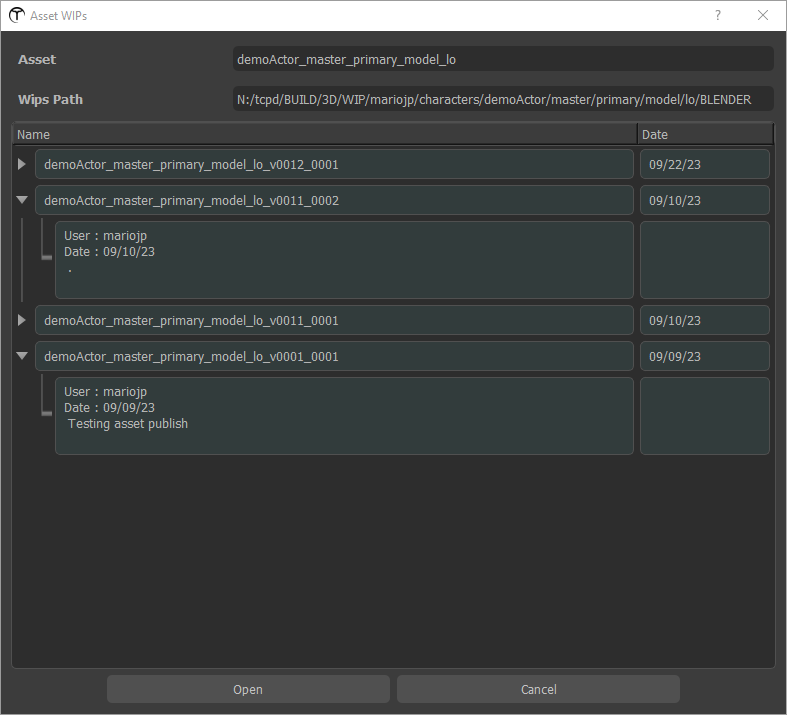
To access the “works in-progress” files (wip) saved by the user, click on the little blue button next to the version dropdown ![]()
This will open the WIPs UI.
In there, you can select the wip version you want and click on the open button to open that scene file.
Asset Info *
You can view the notes and basic metadata for the selected asset in this section.
Launch Bar *
Launch your scene file using the “Launch” button in this section.

Breakdown Example
General UI Info
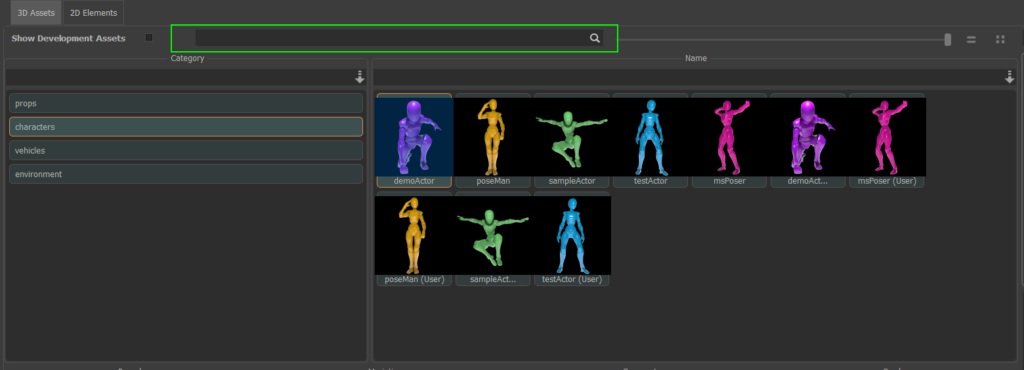
Thumbnail
You can switch to thumbnail view by clicking the “Thumbnail” button and using the slider to adjust the size.
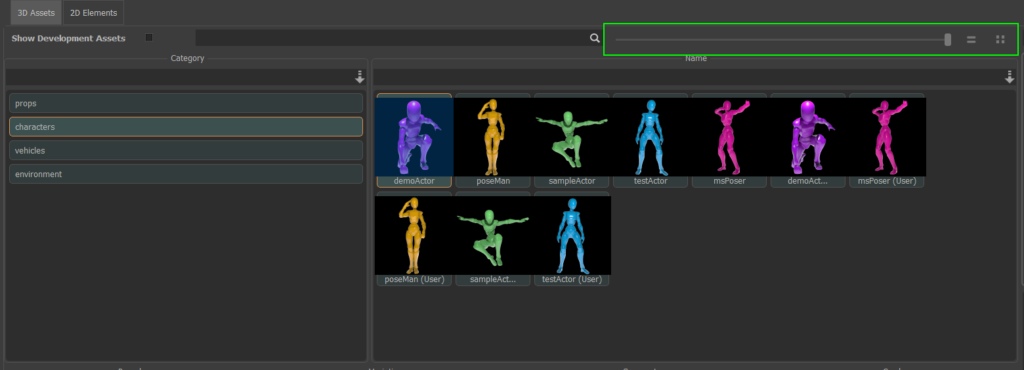
Search
Use the search bar to help narrow your search for an asset.